Foil transfers can turn a simple manicure into something polished, dimensional, and eye-catching. A smooth metallic finish, pattern or layered accent can make even a basic color look custom. The challenge comes from getting the foil to release cleanly without patchy spots, wrinkles, or unwanted gaps.
The right tools simplify that process. Nail artists often focus on the foil itself, but preparation, pressure, adhesive control, and cleanup all shape the result. When each tool has one job, foil application feels less unpredictable and more repeatable. Continue reading to explore the best nail art tools for clean foil transfers.
Fine Nail Files
Clean foil work starts with a smooth nail surface. A fine-grit file helps shape the free edge without leaving rough fibers or sharp corners. Those imperfections can catch foil or interfere with a neat finish around the perimeter.
Use light strokes and check the shape from several angles. Consistent length and even sidewalls create a balanced base for the design.
Buffer Blocks
A buffer removes surface shine and smooths minor ridges before you apply color, gel, or foil adhesive. The goal isn’t to thin the nail plate. You only need to create an even surface that supports proper product grip.
Use gentle pressure and controlled passes. Too much friction can heat the nail and weaken the surface. A fresh buffer also helps refine cured gel before you add a foil detail.
Dust Brushes
Filing dust, lint, and loose particles can block adhesive and create tiny bare spots in the design. A soft dust brush removes debris without scratching the nail.
Choose flexible bristles that reach around the sidewalls and cuticle area. Sweep dust away after filing, buffing, or refining gel. Follow with a lint-free wipe when needed.
This step plays an important role in using transfer foils correctly in nail art because even a small particle can interrupt the transfer. Clean preparation improves adhesion and gives metallic or patterned foil a sharper finish.
Lint-Free Wipes
Cotton rounds and tissues can leave fibers behind, so lint-free wipes offer better control. Use them with cleanser or alcohol to remove dust, oils, and sticky residue.
Fold the wipe into a small square to create a firm cleaning edge. That shape lets you reach close to the sidewalls without flooding the skin. Use a fresh section for each nail so you don’t spread residue across the manicure.
Detail Brushes
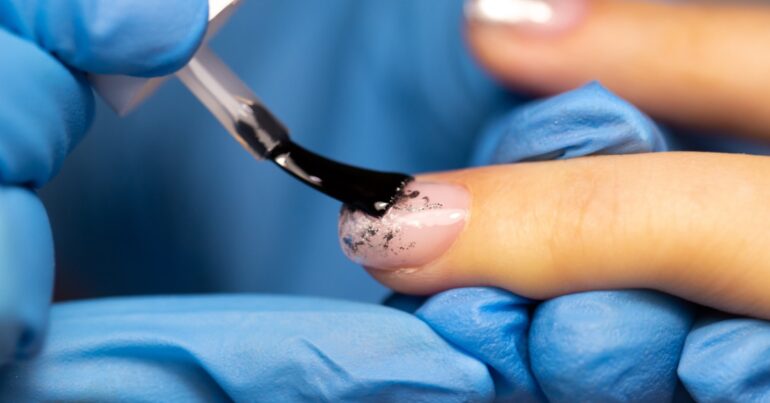
A small detail brush gives you precise control over foil gel or adhesive. It helps you create French tips, swirls, borders, geometric accents, and isolated metallic details without covering the entire nail.
Look for a thin brush with a firm point. Load only a small amount of adhesive and wipe excess product from the stem before you touch the nail. Clean the brush promptly after use because dried adhesive can separate the bristles and ruin the point.
Silicone Tools
A silicone applicator helps press foil into curves, corners, and detailed areas. Unlike a fingernail or wooden stick, silicone applies smooth pressure without scratching the pattern.
Use a rounded tip for full-coverage transfers and a smaller point for isolated areas. Press and rub with steady motion rather than fast, uneven swipes. The silicone tip helps the foil follow the natural curve of the nail.
This tool also helps lift loose fragments or flatten small wrinkles before you seal the design.
Foil Adhesive
The adhesive often determines whether the transfer looks complete or patchy. Traditional foil glue changes texture as it dries, while foil transfer gel cures under a lamp. Both options can work well when you follow the product directions closely.
Apply a thin, even layer. Thick adhesive can wrinkle, pool near the sidewalls, or cure unevenly. A controlled layer usually gives better results than a heavy coat.
Timing also affects the transfer. If you press too early, the foil may slide. If you wait too long, it may fail to release. Practice with one adhesive system until you understand its working window.
LED or UV Lamps
Foil transfer gel needs the correct lamp and cure time. A dependable LED or UV lamp helps the gel reach the tacky finish that grips foil.
Match the lamp to the gel system whenever possible. Different formulas respond to different wavelengths and cure times. Follow the manufacturer’s directions rather than guessing.
Place the hand flat inside the lamp so each nail receives consistent exposure. Uneven curing can create areas that grab the foil and areas that reject it.
Precision Tweezers
Tweezers help you place small foil pieces without touching the adhesive. They also give you better control over patterned foil when you need to align a specific section.
Choose tweezers with a narrow, smooth tip. Sharp edges can puncture thin foil, while bulky tips can block your view. Hold the foil gently and avoid creasing it before placement. Keep tweezers clean so dried gel doesn’t stick to fresh foil.
Small Scissors
Full rolls of foil can feel awkward during application. Small manicure scissors let you cut manageable pieces before you begin.
Cut sections slightly larger than the nail or design area. Extra space gives you room to grip the foil and apply pressure. For patterned foil, preview the image before cutting so the best detail lands where you want it.
Cleanup Brushes
A small cleanup brush helps correct adhesive or gel near the cuticle before curing. Clean borders make the foil design look more professional and reduce lifting.
Dip the brush lightly in cleanser, remove the excess, and trace the skin around the nail. Use short, controlled strokes. Avoid flooding the cuticle area because excess liquid can spread product or dull the finish.
A flat angled brush often gives the best control. Keep one brush for cleanup and another for design work.
Top Coat
Foil needs protection from friction, water, and daily wear. A compatible top coat seals the design and adds shine.
Apply the first layer with light pressure so the brush doesn’t drag or tear the foil. Cap the free edge, then cure or dry according to the product directions. Some foils react better to a flexible gel top coat, while others need a thin base layer before the final seal.
For clients who use their hands often, apply two thin layers instead of one thick coat. Thin layers cure more evenly and preserve the design.
Better Tool Care
Clean tools support cleaner transfers. Wipe metal tools after each use, remove gel from brush handles, and store foils in dry sleeves or containers. Dust and adhesive residue can quickly affect a detailed design.
Label foil rolls by pattern or finish so you can find each design quickly.
Replace worn buffers, damaged brushes, and sticky silicone tips before they affect your work.
A Cleaner Finish
Clean foil transfers come from using the right nail art tools. The foil adds the visual impact, but files, buffers, brushes, adhesive, lamps, and applicators create the conditions for success.
Build a setup that supports each stage. Smooth the nail, remove every trace of dust, apply adhesive evenly, press the foil with purpose, and seal the design carefully. Those habits reduce patchiness and help each transfer look crisp.
With the right tools and a reliable routine, foil nail art becomes easier to repeat and customize. You can create full metallic coverage, delicate accents, or layered designs without relying on luck. The result looks cleaner, lasts longer, and gives every manicure a polished finish.